How to embed image in jupyter notebook from a local file or web resource?
This tutorial guides you on how to insert or embed image in jupyter notebook from a local file or web resource and also using base64 encoding algorithm. Jupyter Notebook is a open-source software provides as easy-to-use interactive data science environment across many programming languages like Python.
Embed image in jupyter notebook
There are three ways to embed or add image in jupyter notebook. The first two ways are standard way that relies on external images i.e., either from local file or an image URL. Apart from these two ways, there is another approach called Base64 encoding method.
Let’s see all three ways of embedding image in jupyter notebook with an example for our understanding.
Way 1: Embed an image from a local file
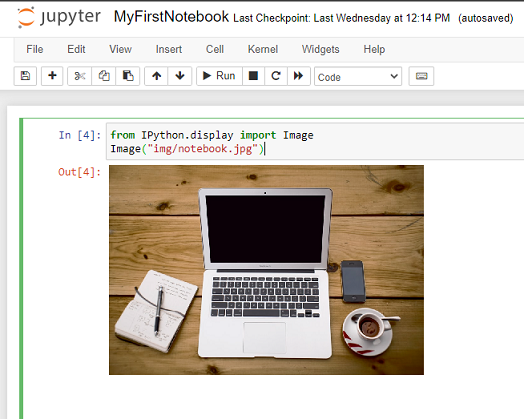
To insert images from local machine you need to provide path to the local file. In this example, we will be using Image class from IPython’s display module as shown below.
from IPython.display import Image
Image("img/notebook.jpg")
Below is the screenshot which illustrate the same.
Note, there is a cons if you follow this way because the local file path provided may not work if you run the scripts in another system. Also you have to make sure that you have included all the images that you have used in the notebook using local file path.
Way 2: Embed an image from URL or web resource
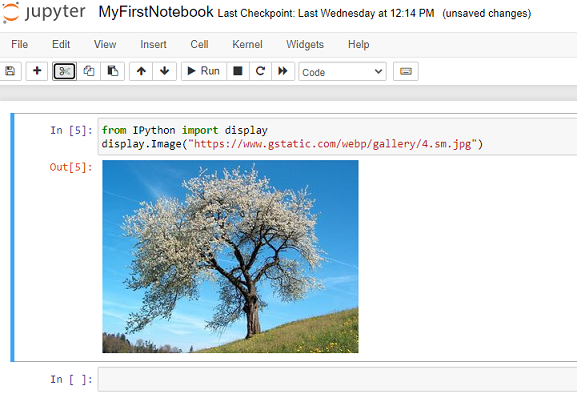
This is another way of inserting images in jupyter notebook using image URL or web resource as shown below.
from IPython import display
display.Image("https://www.gstatic.com/webp/gallery/4.sm.jpg")
Below is the screenshot which illustrate the same.
Note, there is a cons to follow this way also as in this case, the image hosted by the provider may remove or change at anytime.
Way 3: Add an image to notebook by Base 64 Encoding
As you know, the first two ways depends on external resources. But in this way, we embed image as a text using Base64 encoding algorithm.
Base64 is a binary-to-text encoding algorithm for converting data including images as plain text, which is one of the most popular binary-to-text encoding schemes. It is commonly used in HTML, JavaScript, CSS and XML scripts.
You can use any online tool to convert images to Base64. Then copy the encoded image code and use Python standard base64 library to decode the same as shown below.
from IPython import display
from base64 import b64decode
base64_image_code ="/9j/4AAQSkZJRgABAQEASABIAAD/2wBDAAYEBQYFBAYGBQYHBwYIChAKCgkJChQODwwQFxQYGBcUFhYaHSUfGhsjHBYWICwgIyYnKSopGR8tMC0oMCUoKSj/2wBDAQcHBwoIChMKC/X/ANdqPrF/08LCwuD9V3yVh3uNX//Z"
display.Image(b64decode(base64_image_code))
That’s it. In this approach you no need to worry about external resources. And they are all available as image code within your jupyter notebook.
Hope it helped 🙂
You’ll also like:
- How to increase the cell width of the Jupyter Notebook in browser ?
- Add python3 kernel to jupyter IPython notebook ?
- Reset jupyter notebook theme to default theme
- How to change the default theme in Jupyter Notebook ?
- Change the Jupyter Notebook startup folder in Windows & Mac
- To run Jupyter Notebook on Windows from command line
- Run a Jupyter Notebook .ipynb file from terminal or cmd prompt
- Amazon Linux AMI : apt-get command not found
- Linux: sudo: apt-get: command not found
- How to Start Stop Restart MariaDB on Linux OS ?
- Putty Fatal Error No supported authentication methods available
- How to find which users belongs to a specific group in linux
- How to unzip a zip file from Terminal (Google Cloud Shell)
- Build a Docker Image with a Dockerfile and Cloud Build in GCP?
- Is it possible to change Google Cloud Platform Project ID ?
- Create non-root SSH user account and provide access to specific folders
- Install Python 3 on Windows 10 machine
- Can I use multiple values.yaml files for Helm Chart ?
- Convert negative to positive number in Python ?


beneficial article
Thank you.