How to enable debugging in WordPress website ?
This tutorial guides you on how to enable debugging in WordPress website. In this article we will see several settings or options using which you can enable debugging in WordPress.
Enable debugging in WordPress website
Debugging is part of any project and WordPress also has support for debugging. WordPress shipped with debug systems designed to debug problems in the main application (core), plugins and themes.
Let’s go through various debugging tools and options available in WordPress.
WP_DEBUG – WordPress Debug
WP_DEBUG is a global variable constant that can be used to configure WordPress “debug” mode throughout. By default the value of this global variable is “false” and it needs to be set “true” in wp-config.php file to enable WordPress debug mode.
Login to your hosting cpanel and go to the WordPress root directory, open the wp-config.php file in your preferred editor.
For example, to enable WordPress debugging mode, add the following in that config file.
// To enable debugging.
define( 'WP_DEBUG', true );
After making the above change, save the modifications. Debugging mode is active now.
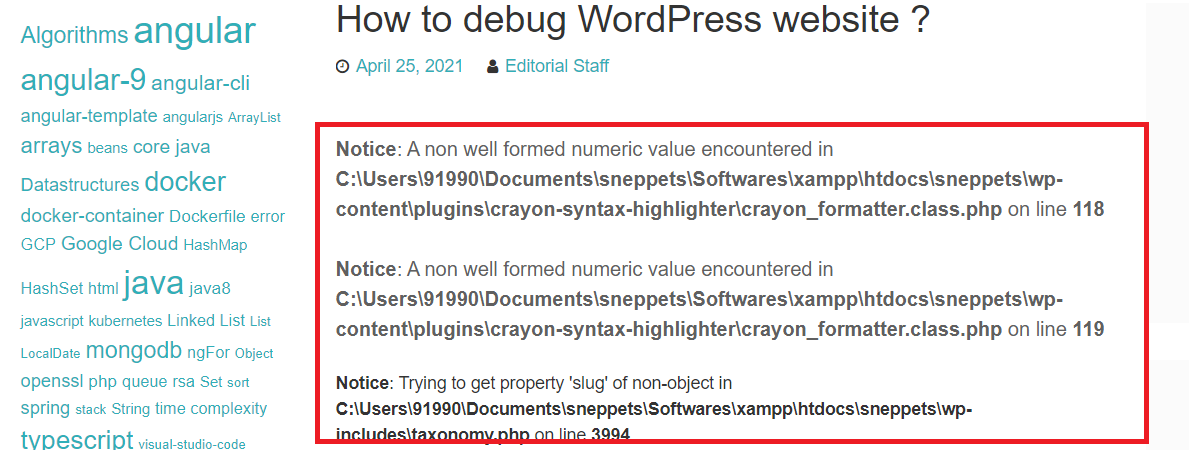
Note, this setting will display all PHP errors, notices and warnings. This settings also display notices about deprecated functions and arguments as shown in the screenshot below.
WordPress debugging – Additional Options
WordPress allows you to configure other additional settings to control debugging information. The following are the additional options you can use apart from WP_DEBUG.
WP_DEBUG_LOG
If you wanted to save all the logs to a file called debug.log file, then you need to enable WP_DEBUG_LOG. Therefore WordPress can save all the errors details to the debug.log file. By default the setting value is “false“, you need to set it to true in wp-config.php as shown below.
define('WP_DEBUG_LOG', true);
WP_DEBUG_DISPLAY
When you enable WP_DEBUG_DISPLAY setting in WordPress, you will see error and warning messages getting displayed on web pages itself.
By default this setting is enabled, that’s why the above screenshot shows debug information on web page itself.
In order to disable this setting, you need to add the following line in wp-config.php file.
define('WP_DEBUG_DISPLAY', false);
SCRIPT_DEBUG
Enabling this setting in WordPress website will force it to use the development versions of core CSS and JavaScript files instead of the minified versions that are usually loaded.
By default this setting is disabled. In order to enable this setting, you need to add the following line to the wp-config.php file.
define('SCRIPT_DEBUG', true);
SAVEQUERIES
For instance, if you are facing database issues in your WordPress website, then you can enable query logging.
This setting causes the following items will get saved in the global $wpdb -> queries
- Each database query will be saved.
- The time taken for the query to run.
- Which function called it.
Example – WordPress Debug Config (wp-config.php)
You can use the following code in wp-config.php file. These settings will enable logging all errors, notices and warnings to a file called debug.log in wp-content directory.
For example,
// Enable WordPress debug mode
define( 'WP_DEBUG', true );

// Debug logging to the /wp-content/debug.log file
define( 'WP_DEBUG_LOG', true );

// Disable display of errors and warnings
define( 'WP_DEBUG_DISPLAY', false );

// Use development versions of core JS and CSS files
define( 'SCRIPT_DEBUG', true );
That’s it. You have learnt how to debug WordPress errors using various tools and settings options available.
Hope it helped 🙂
You’ll also like
- Manually Backup WordPress Site using cPanel – Bluehost & Local Setup ?
- Default .htaccess file for WordPress website ?
- How to configure XAMPP PHP to send mail from localhost ?
- XAMPP browser redirects to localhost/dashboard
- wp-admin not working: wp-login.php redirects to wp-admin%2F&reauth=1
- TinyMCE Advanced Editor no longer working – WordPress
- SEO incoming links are not getting displayed in WordPress dashboard
- How to transfer copy of WordPress website to Google Cloud for free
- Convert floating point number to fixed point

